In the following article you will learn how to manually create, edit and delete rations in fodjan in the menu “Rations”. An alternative for quick ration editing is also the assistant.
Note: Before you create rations, check whether you have finished creating the feed groups for the farm and have included the necessary feed in your stock. Read about creating, editing and deleting feed groups and creating feed.
Answers to frequently asked questions about ration settings can be found here.
Required user rights: Writing rights, owner or admin.
To manually create, edit or delete a ration in fodjan Pro, go to Rations > Overview in the left menu.
- Click in the left menu on Rations > Overview
- Use the button “Enter ration manually” on the top left corner

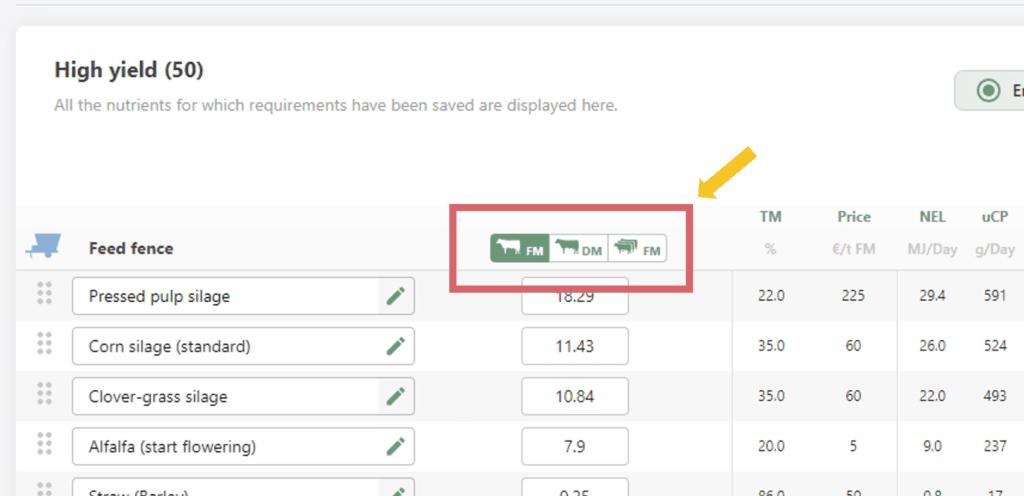
- Set whether you want to enter the feed quantities in dry matter, fresh matter or fresh matter per group.
- Enter the feedstuffs of the ration and their quantities (without residual feed, only ingested quantities). According to the feed model, the extent to which your ration meets the ingredient requirements is displayed directly below the ration – more on this later in the article.

Recommendation: Only enter feedstuffs that you have already included in the stock, because feed health assessment and ration optimisation functions in fodjan will help you all the more accurately if the data reflect your actual status on the farm.
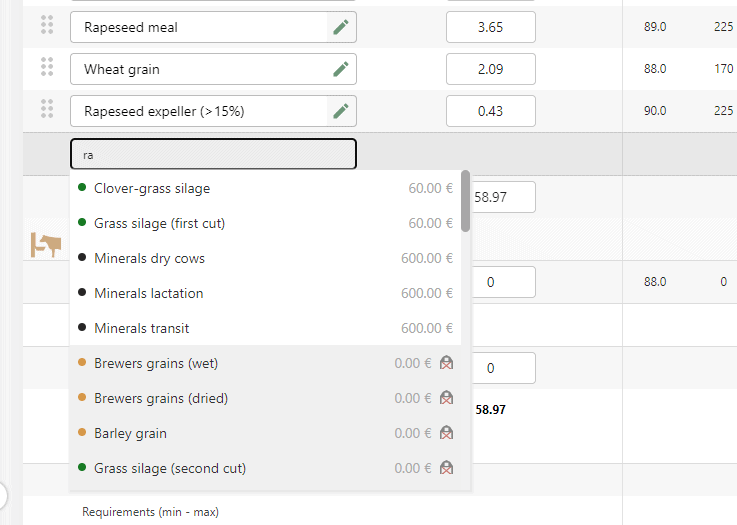
All feeds that you have not yet included in the stock are marked with the following symbol after the name:

So it’s best to only enter feeds where the symbol is missing:
More here: Create feed.
Note: Using the buttons at the top of the ration you can switch between the view of “Energy, Protein, Carbohydrates, …”, “Quantitative & Trace Elements” or “Vitamins & Other”. You can also set which ingredients appear in these – in the ingredient requirements of the feed model. You can find out more about this here.

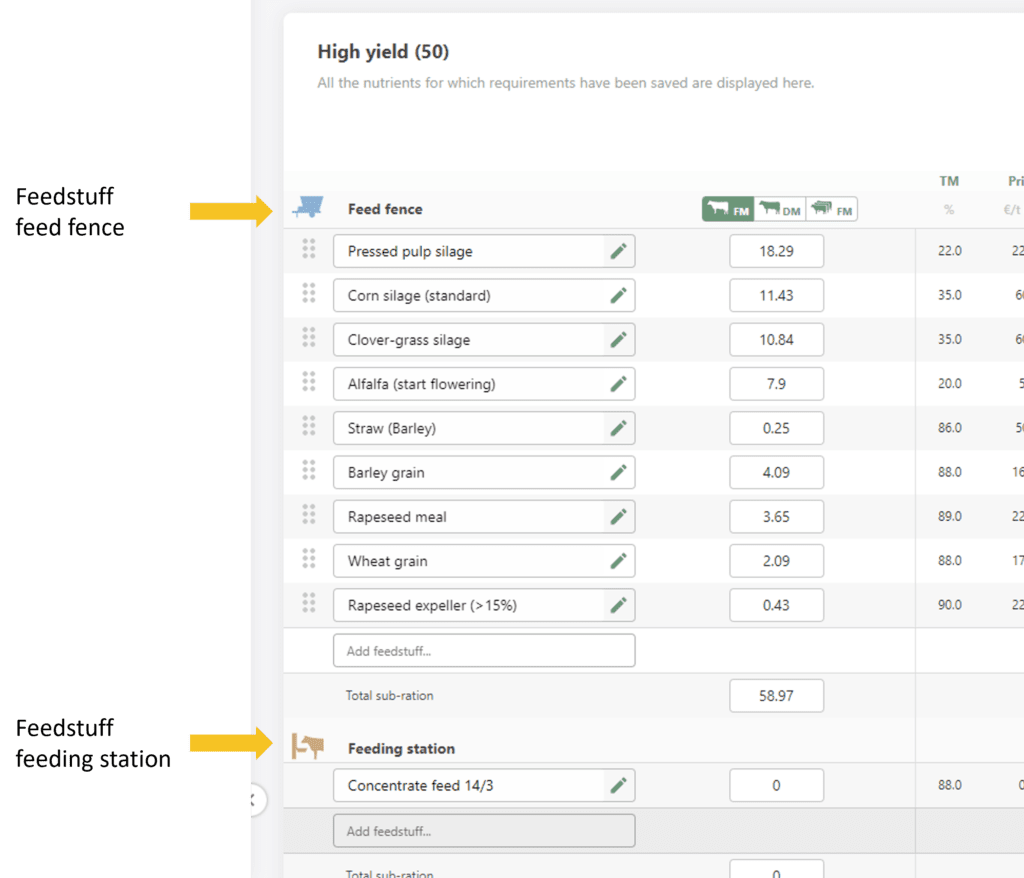
If you have created a concentrate station in your feed group settings, enter the feeds for your feed table at the top and the feeds for the concentrate station at the bottom.
Beispielansicht:
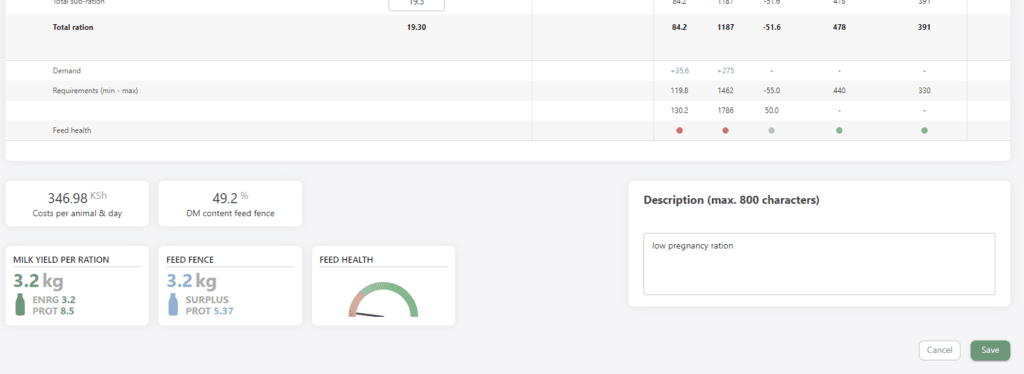
- Once you have entered all the required components with quantities, scroll down. Here you can enter a description that is also shown in the ration overview.
Note: If you want to export rations, e.g. to the feed mixer, you must set a start date so that the correct current ration is exported. Read more about this here: Using the feed mixer interface and exporting, printing and sharing rations.
At the bottom right you will also see the following representations:

- The tacho symbol on the left shows the feed health score (FHE).
- To the right, it indicates how much milk can be obtained mathematically from the ration or from the ration components fed at the feed table (see also Creating a concentrate station).
- The amount of milk is calculated from the amount consumed and therefore does not take into account any residual feed. This is only taken into account during feeding, e.g. during ration exports or when using “Feed now” in the app. The calculation is based on the settings in your feed group and feed model.
- In addition, it is indicated which milk surplus is achieved from protein. From this you can see whether the ration is rather fed too much or too little protein.
- Go to the bottom right and click on the button “Save ration”.
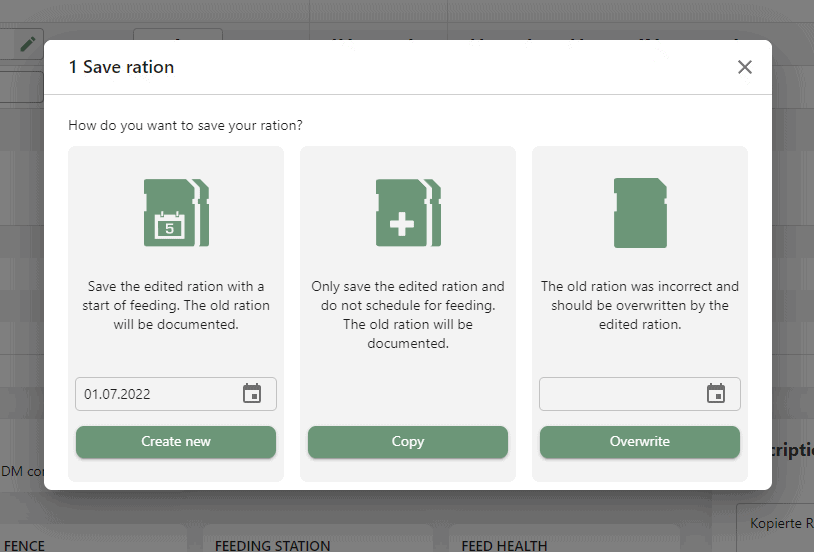
- If you want to save the ration without a feeding start date, click on “Copy” in the following display. Otherwise, set a date for the feeding start and click on “Create new“. If you want to overwrite the original ration, click on “Overwrite” (Attention: For the mixing wagon you should then export the latest ration version).
- Go to the feed group for which you want to edit a ration.
- Click on the pencil icon in the ration you want to edit.

- Make the desired changes. Feed or ration components can be removed by clicking on the red symbol on the right.

Note: You can find out how to change the mixing order here.
- Then click on the “Save ration” button at the bottom right. You can now create, copy or overwrite the ration.
When is which option useful?
- Create new: Here, both original and revised rations are retained. This option can be selected, for example, if the farmer and/or feeding adviser want to view changes in the mixing sequence at a later date. With this option, a feeding start is set, i.e. this ration becomes the active one from now on.
- Copy: Here the original and revised ration are retained. This option can be useful if, for example, the adviser wants to make several suggestions to the farmer for the mixing sequence, all of which are not yet to go into the current feeding, but are to remain in planning for the time being. No feeding start is set.
- Overwrite: Here the revised ration replaces the original one. You can select this option if not every change in the mixing order has to be documented. This way the overview in the feeding groups remains better. Only the revised ration remains, not the original one.
- Go to the feed group for which you want to delete a ration.
- In the ration you want to delete, go to the red trash can icon.

The ration has been deleted from your feed group.
Rations can be optimised or improved using the wizard or the ration catalogue. Read the article Ration optimisation with fodjan – Overview and the articles that build on it:
Required user rights: Edit rations
To create, edit or delete a ration in the fodjan app, go to Feeding in the bottom menu and select the appropriate feed group.

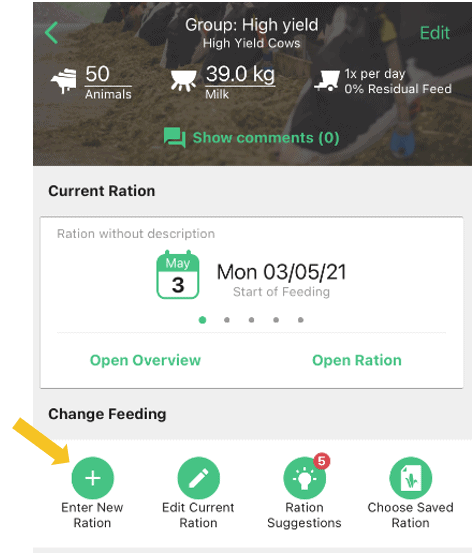
- Go to the feed group for which you want to create a ration.
- Go to the “+” (enter new ration).
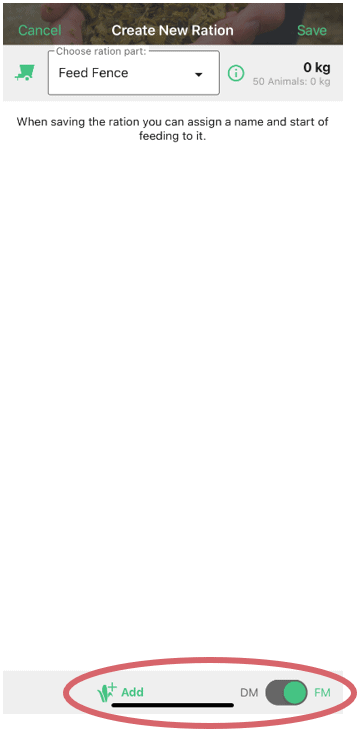
- Select between dry matter or fresh matter at the bottom right. Go to the feed icon at the bottom to add a feed or ration component from the database or from the stock. You can select feeds manually or use the search at the top.
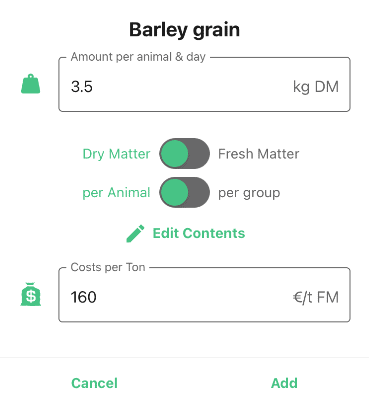
- Enter the required information about the ration component. Then go to “Add”.
- Note: You can adjust the ingredients via the pencil icon.
- Only the ingested quantity has to be entered, residual feed does not have to be taken into account at first. This is automatically taken into account based on your feed group setting when feeding (e.g. when using the “Feed now” function in the app).
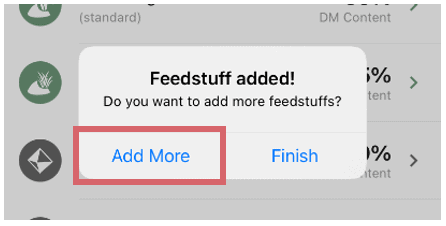
- If you want to add more ration components to the ration, now go to “Add more”.
- To save the ration, go to “Save” in the top right-hand corner. You can name the ration and set a feeding start. Then click on “Save” in the bottom right-hand corner.
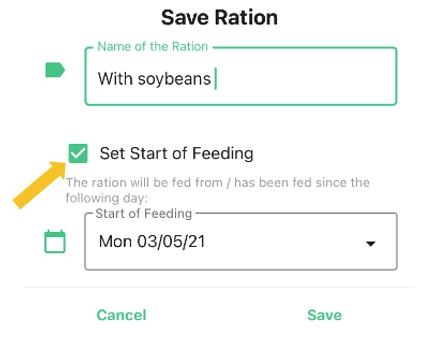
When to set the start of feeding? If the ration is to be fed from a certain date, you can set a feeding start date. Then the feeder can actively use the “Feed now” function in the feeding.
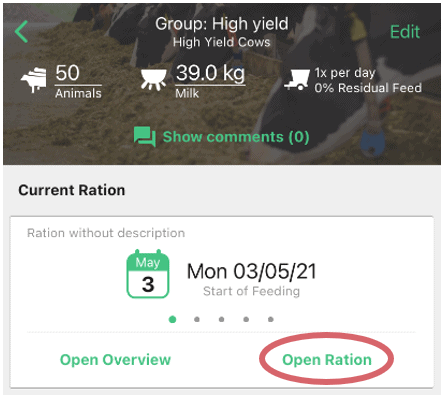
The ration is now stored. To retrieve it, go to your feed group in the menu item Feeding. You can access your current ration of the feed group via “Open ration”.
To call up the other rations, scroll down. Under “fed” you will find all the rations you have fed so far, including the current ration. Under “saved” you will find all rations without a feeding start date, under “planned” all those whose feeding start date is in the future.
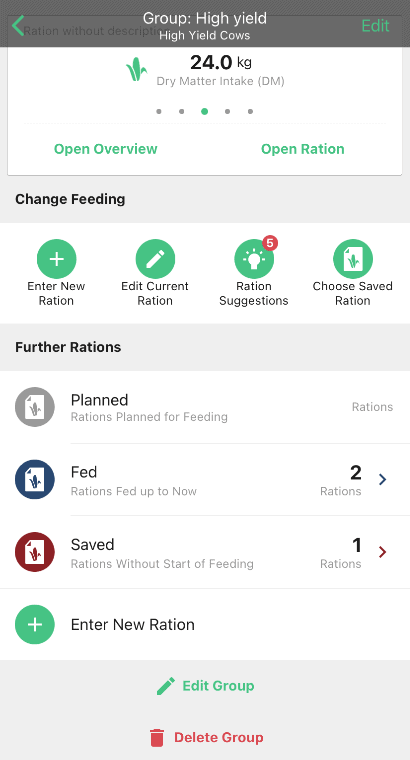
- Go to the feed group where the ration you want to edit is.
- Scroll down.
- If you want to change a ration whose feeding is in the future, go to “planned”.
- Under “fed” you will find the current ration and all rations that have been fed before.
- Rations without feeding start can be found under “saved”.
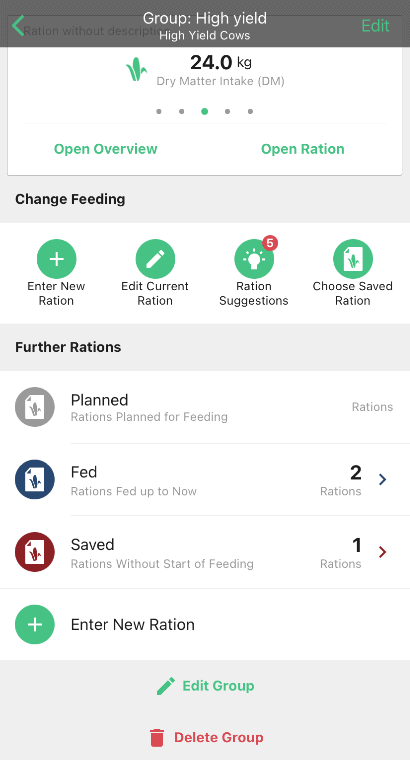
- Click on the ration you want to edit and go to “Edit” at the top right.
- By clicking on the feed you can change ingredients of the feed and feed quantities.
- You can delete a feed in the feed via the red symbol on the right.
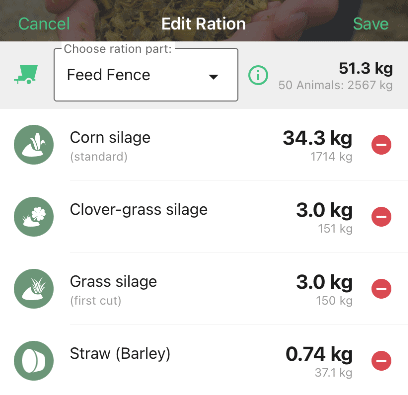
- You can make changes to feed quantities or prices by clicking directly on the feed, changing the details and confirming with “Done”.
- You can add feed via the feed symbol at the bottom (see also under “Create rations” above).
Note: You can find out how to change the mixing order here.
- When saving the ration you have different options, “create new” or “overwrite” each with and without feeding start. Select the desired option and click on “Save” at the bottom right.
When is which option useful?
- Create new: Here, both original and revised rations are retained. This option can be selected, for example, if the farmer and/or feeding adviser want to view changes in the mixing sequence at a later date. With this option, a feeding start is set, i.e. this ration becomes the active one from now on.
- Copy: Here the original and revised ration are retained. This option can be useful if, for example, the adviser wants to make several suggestions to the farmer for the mixing sequence, all of which are not yet to go into the current feeding, but are to remain in planning for the time being. No feeding start is set.
- Overwrite: Here the revised ration replaces the original one. You can select this option if not every change in the mixing order has to be documented. This way the overview in the feeding groups remains better. Only the revised ration remains, not the original one.
- Go to the feed group where the ration you want to delete is.
- Scroll down.
- If you want to delete a ration whose feeding is in the future, go to “planned”.
- Under “fed” you will find the current ration and all rations that have been fed before.
- Rations without feeding start can be found under “saved”.

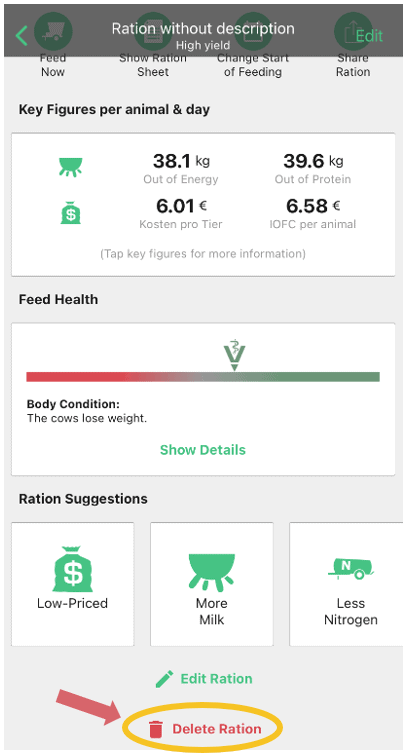
- Click on the ration you want to delete.
- Scroll down and select “Delete ration”. Confirm that you really want to remove the ration.
Was this article helpful?
Help us to become better by rating this article
Write us an e-mail to support@fodjan.de and
let us know how we can help.
Thanks for your feedback!
See also
What is „Milk yield per ration”?
Read more >
Change displayed nutrients of the ration
Read more >
Notification: Settings of the feed group are not complied with
Read more >
Ration scaling to a quantity target
Read more >
Why is a feedstuff in a ration greyed out?
Read more >
Questions we couldn’t answer?
Simply keep searching here:
Contact us:
support@fodjan.de
or weekdays in in urgent cases:
+49 (0) 351 4188 6693
